Welcome to Navy History Matters—our biweekly compilation of articles, commentaries, and blogs related to history and heritage. Every other week, we’ll gather the top-interest items from a variety of media and social media sources that link to related content at NHHC’s website, your authoritative source for Navy history.
Compiled by Brent A. Hunt, Naval History and Heritage Command Communication and Outreach Division
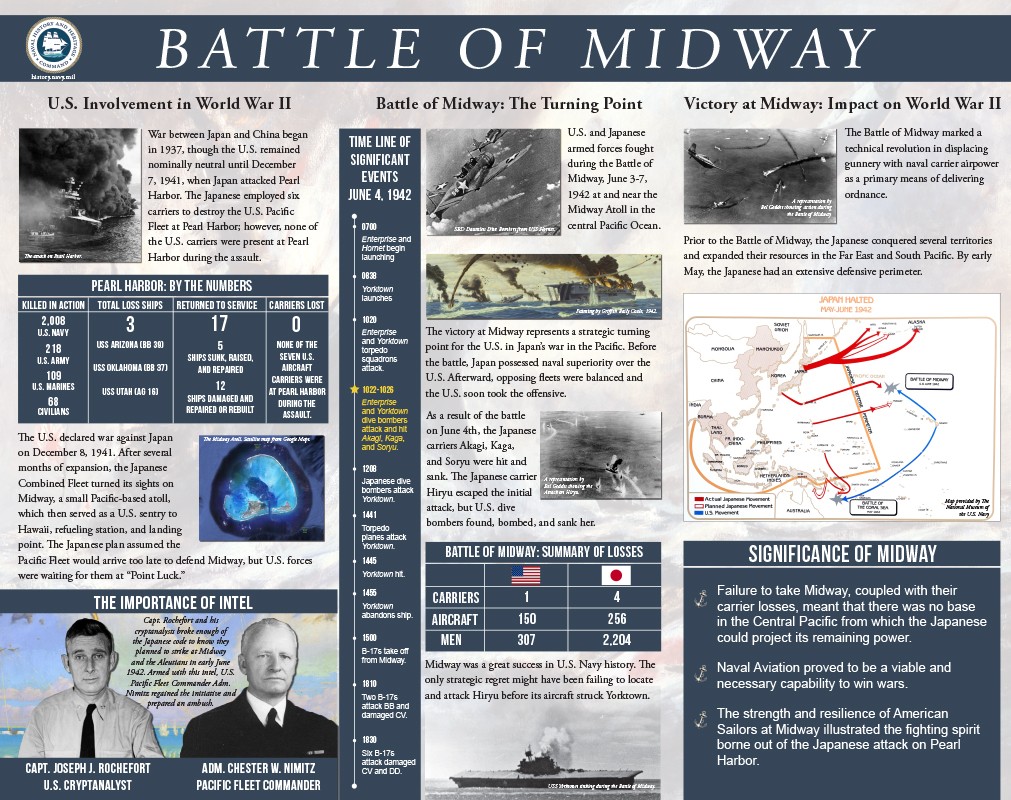
Decisive American Victory in the Pacific—Battle of Midway
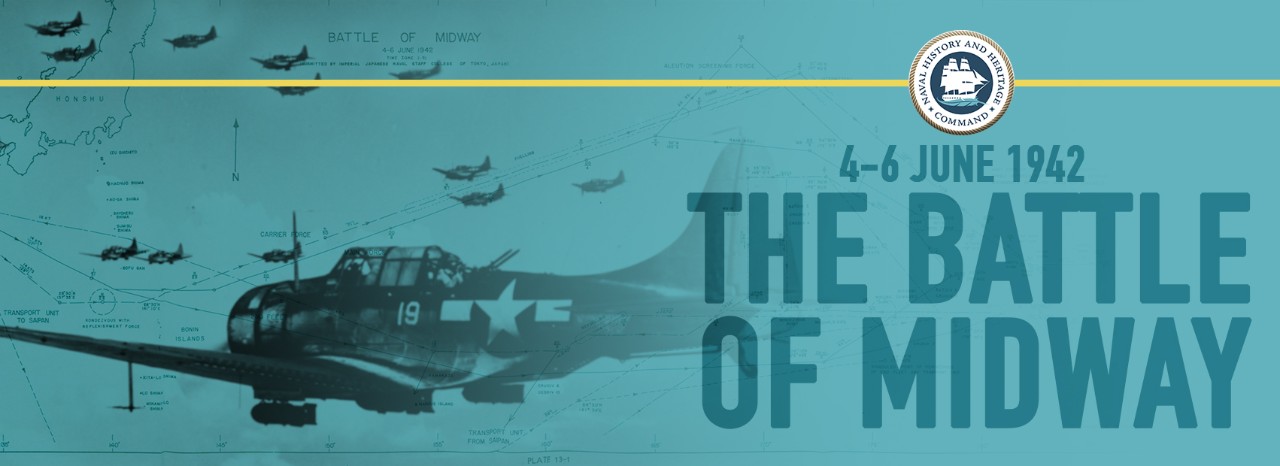
On June 4, 1942, the pivotal Battle of Midway was underway. That morning—after launching aircraft to attack the U.S. base at Midway—Japanese carriers Akagi, Kaga, and Soryu were mortally damaged by dive bombers from USS Enterprise (CV-6) and USS Yorktown (CV-5). However, later in the day, Yorktown was lost after taking multiple bomb and torpedo strikes by aircraft from Japanese carrier Hiryu. In turn, Hiryu was subsequently knocked out of the fight by U.S. carrier planes. Devastated by their losses, the Japanese retired westward. The battle, which lasted from June 4 to 6, 1942, was a decisive victory for the U.S. Navy, bringing an end to Japanese naval superiority in the Pacific and turning the tide of the war in this theater.
Following the attack on Pearl Harbor and the United States’ subsequent entry into World War II, the Japanese mounted attacks on U.S., British, and Dutch territories in the Pacific and Southeast Asia. The first phase of the Japanese offensive was the seizure of Malaysia, Singapore, the Dutch East Indies, the Philippines, and various island groups in the central and western Pacific. The second phase was to isolate and neutralize Australia and India. In the Pacific, the Japanese planned to seize bases in New Guinea and the Solomon Islands, which would then be used to support future operations against New Caledonia, Fiji, and Samoa. By March 1942, with the seizure of Lae and Salamaua, the entire north coast of New Guinea had fallen into Japanese hands. At the time, U.S. radio-intercept units were in operation, with one in Australia and the other at Pearl Harbor. These facilities intercepted Japanese radio communications and, through cryptoanalysis and codebreaking, uncovered the location of major Japanese fleet units and shore-based air forces. More importantly, by translating messages and studying operational patterns, the radio-intercept units were able to predict future Japanese operations with some degree of certainty. The units provided their analysis, through daily briefings and warning reports, to senior commanders. On March 13, American cryptanalysts were able to identify the Japanese code designation “AF” as Midway.
In the meantime, after several months of debate, Adm. Isoruku Yamamoto had convinced Japanese leadership to agree to his Midway and Aleutians plan. The centerpiece was a diversionary operation toward the Aleutians followed by the invasion of Midway. The U.S. Pacific Fleet was expected to respond to the landings on Midway; however, Japanese carrier and battleship task forces were to be waiting undetected to the west of the island. They would fall upon and destroy the unsuspecting Americans. If successful, the U.S. Pacific Fleet would be effectively eliminated for at least a year. On May 5, Japan issued “Navy Order No. 18,” which directed Yamamoto, in cooperation with the Japanese army, to occupy Midway and key points in the western Aleutians.
On May 26, the Japanese Northern Force headed toward the Aleutians, and the next day, a Japanese force consisting of the four large carriers Akagi, Kaga, Soryu, and Hiryu, with a total of 229 embarked aircraft, steamed for Midway. Two days later, elements of the Japanese First Fleet departed home waters while elements of Second Fleet, including 15 transports, steamed from Saipan. Meanwhile, Rear Adm. Raymond Spruance’s Task Force Sixteen (TF-16)—formed around Enterprise and USS Hornet (CV-8)—departed Pearl Harbor on May 28 to take up a position northeast of Midway. Two days later, Task Force Seventeen (TF-17), under the command of Rear Adm. Frank Fletcher, formed around Yorktown and steamed from Pearl Harbor to join TF-16 northeast of Midway. When TF-17 and TF-16 converged about 350 miles northeast of Midway on June 2, Fletcher was in command of the combined force. The three U.S. carriers, augmented by cruiser-launched floatplanes, provided 234 aircraft afloat. These were supported by 110 fighters, bombers, and patrol planes at Midway. As part of the pre-battle disposition, 25 U.S. fleet submarines were also deployed around Midway.
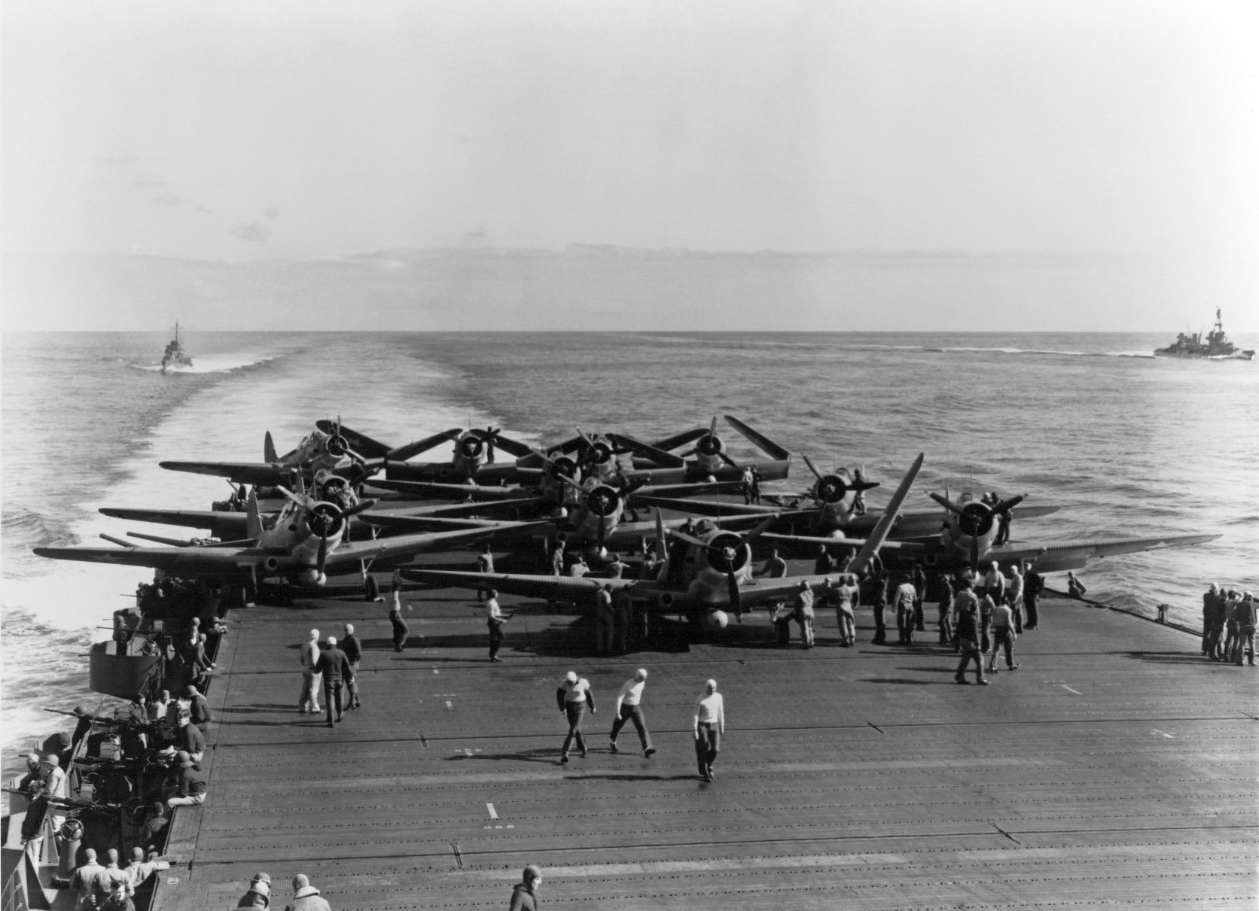
Just after midnight on June 4, U.S. Pacific Fleet task forces were on the course and speed of the Japanese main body. Shortly after dawn, a patrol plane spotted two Japanese carriers and their escorts, reporting, “Many planes heading to Midway from 320 degrees, distance 150 miles!” Later that morning, at roughly 6:30 a.m., Japanese carrier aircraft bombed Midway installations. Although U.S. Marine Corps fighters defending the island suffered heavy losses, the Japanese inflicted little damage to the island’s facilities. Between 9:30 and 10:30 a.m., torpedo bombers from the three American aircraft carriers attacked Japanese carriers. Although the aircraft were nearly wiped out by the defending Japanese fighters and antiaircraft fire, U.S. fighters drew off enemy aircraft, leaving the skies wide open for dive bombers from Enterprise and Yorktown. Aircraft from Enterprise bombed and fatally damaged carriers Kaga and Akagi, while aircraft from Yorktown bombed and wrecked carrier Soryu. At approximately 11 a.m., Hiryu, the one Japanese carrier that escaped destruction that morning, launched dive bombers that temporarily disabled Yorktown. Three and a half hours later, Hiryu's torpedo planes struck a second blow, forcing Yorktown personnel to abandon ship. That afternoon, aircraft from Enterprise mortally damaged Hiryu. The destruction of the Japanese force compelled Yamamoto to abandon his Midway invasion plans, and the Japanese fleet began to retreat westward.
The following day, Spruance’s TF-16 chased the Japanese fleet westward, while attempts to salvage Yorktown continued. Japanese carriers Akagi and Hiryu were scuttled earlier that day. The last attacks of the Battle of Midway took place on June 6 when dive bombers from Enterprise and Hornet bombed and sank heavy cruiser Mikuma, and damaged destroyers Asashio and Arashio, as well as cruiser Mogami. After recovering its aircraft, TF-16 steamed eastward and broke off contact with the enemy. Intelligence, over the following two days, reported the withdrawal of Japanese forces toward Saipan and the Japanese home islands. Also on that day, Japanese submarine I-168 interrupted the U.S. salvage operations on Yorktown, torpedoing the carrier and sinking destroyer USS Hammann (DD-412). Screening destroyers depth-charged I-168, but the Japanese submarine escaped. Yorktown finally rolled over and sank at dawn on June 7.
Thanks to American intelligence capabilities, analysis, aircraft carrier tactics, and a healthy dose of luck, the U.S. Navy inflicted a devastating blow to the Imperial Japanese Navy. Although the performance of the three American carrier air groups would later be considered uneven, their pilots and crews had won the day through courage, determination, and heroic sacrifice. The U.S. Navy lost a carrier, but the Japanese had lost four—all of which had participated in the Pearl Harbor attack. More importantly, the Japanese had lost more than 100 trained pilots, who could not be replaced. In a larger strategic sense, the Japanese offensive in the Pacific was derailed, and their plans to advance on New Caledonia, Fiji, and Samoa postponed. The balance of sea power in the Pacific had begun to shift in favor of the Allies.
D-Day@80
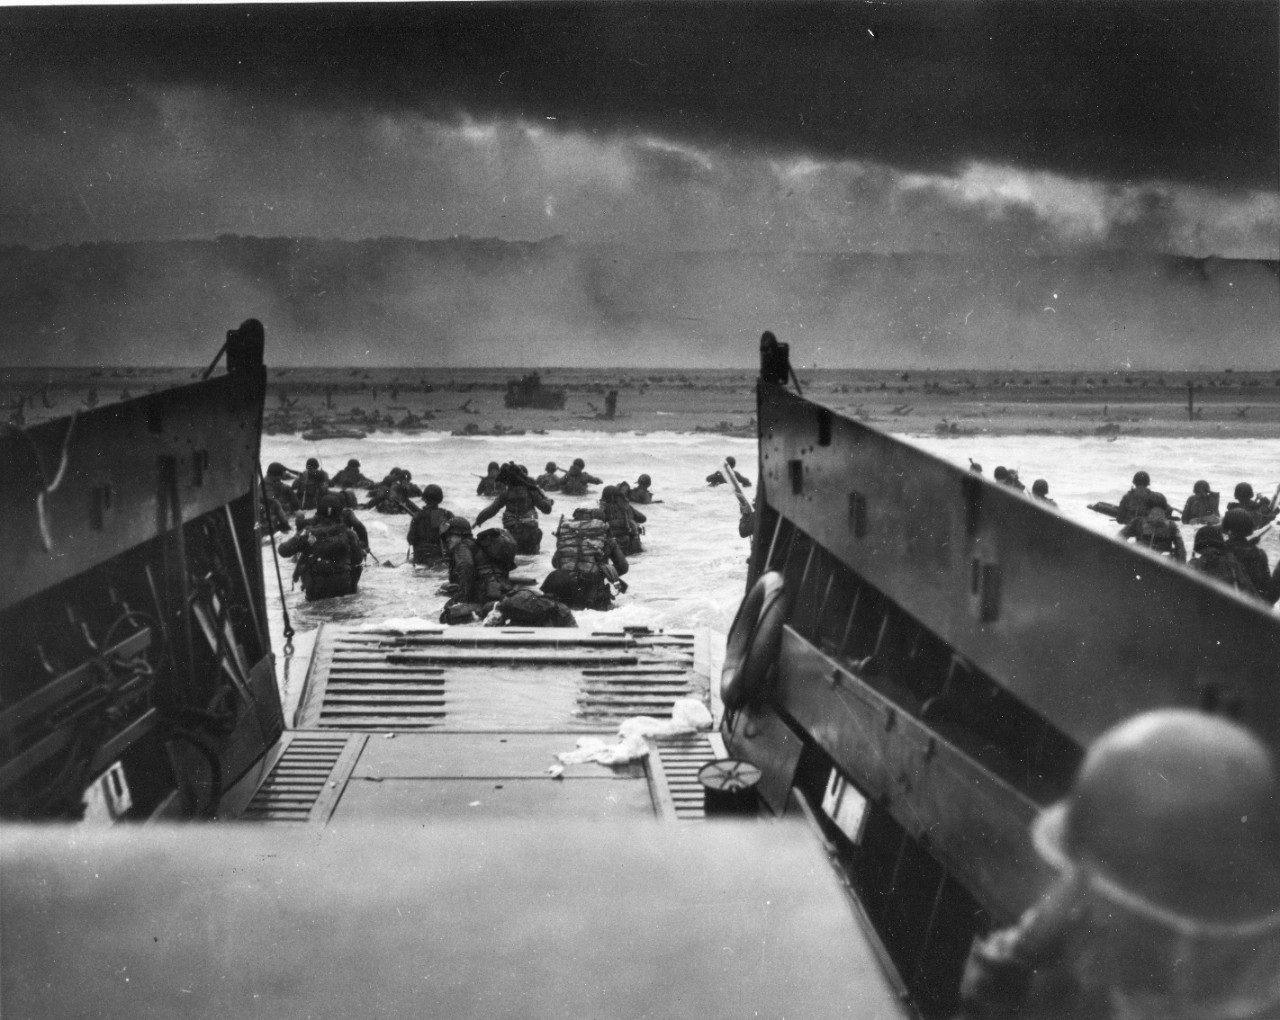
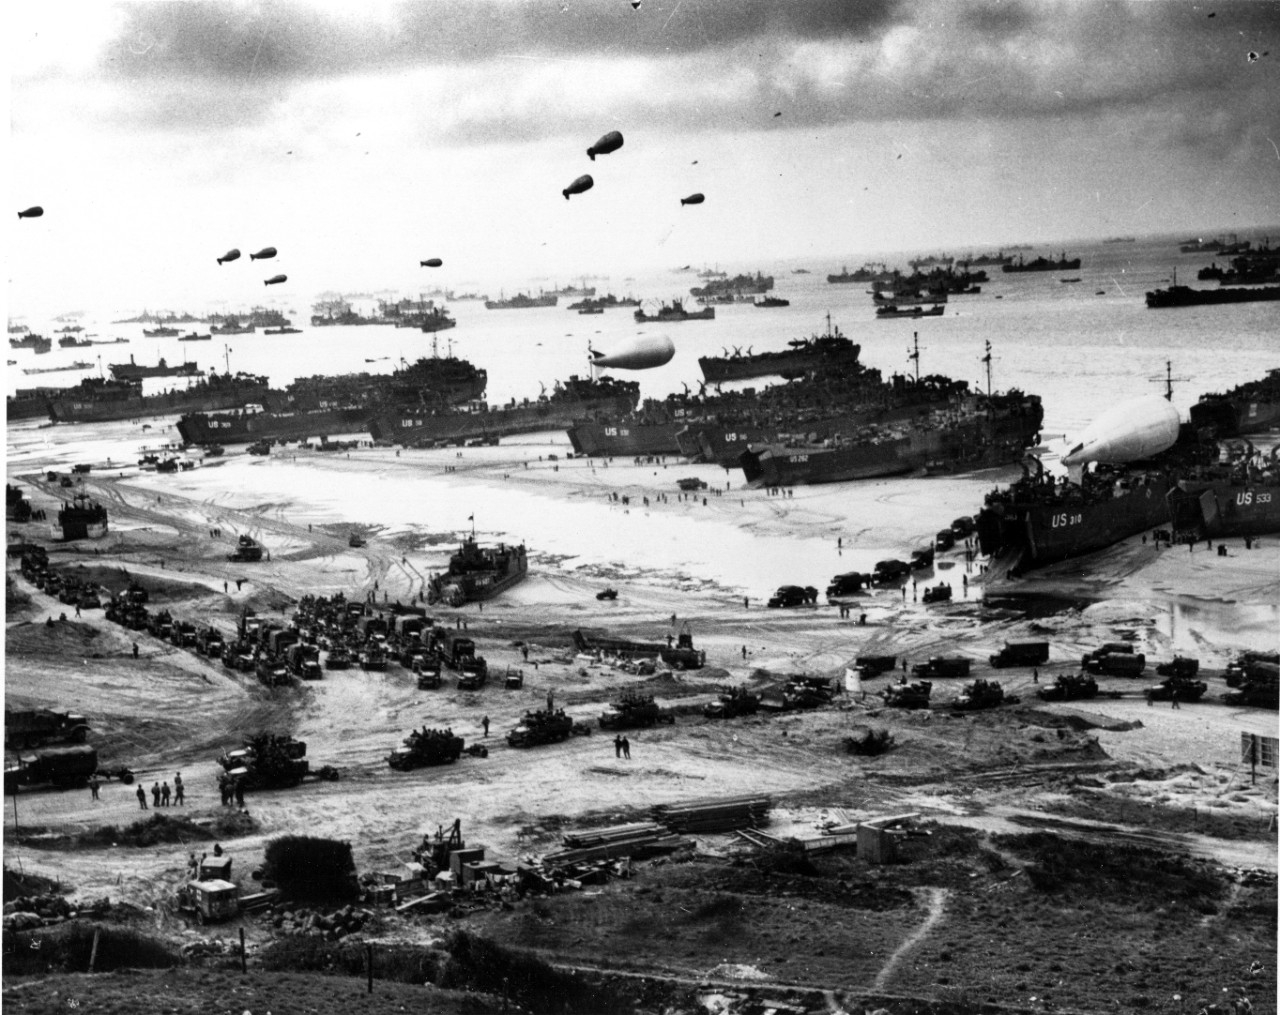
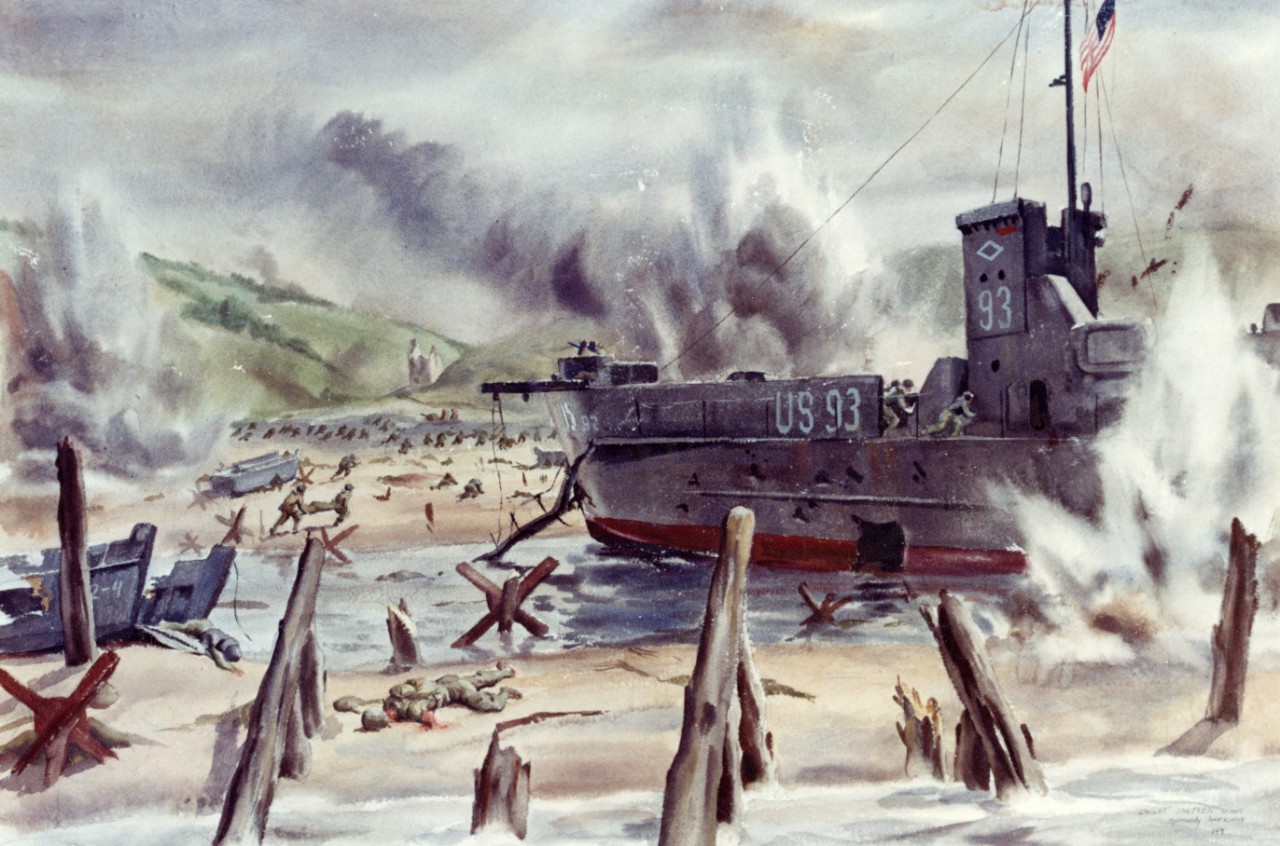
At first light, on June 6, 1944, 80 years ago, nearly 7,000 U.S. and British ships and craft carrying about 160,000 troops lay off the beaches of Normandy, France, in anticipation of the largest amphibious landing in history. The massive assault, code-named Operation Overlord (D-Day), surprised the Germans, who had overestimated the poor weather conditions and were also expecting the Allies to attack the Pas-de-Calais area to the northeast. After assembly and a 24-hour weather delay, the fleet made its way across the English Channel toward the French coast. In passages cleared by minesweepers, it proceeded to assigned landing beaches—U.S. (Utah, Omaha) and British-Canadian (Gold, Juno, Sword). Initially, cruisers and destroyers bombarded enemy coastal fortifications and strongpoints, followed by tactical air strikes. In each of the attack waves, LCTs (landing crafts, tank) carried specially configured amphibious tanks that supported the infantry once ashore. Patrol boats served as control vessels off each of the beaches, and destroyers and other small combatants stood by to provide gunfire support. Despite their success, some 4,000 Allied troops were killed in action by German soldiers defending the beaches. However, within a few days, about 360,000 troops, more than 50,000 vehicles, and 100,000 tons of equipment had landed. Within two weeks, Paris was liberated by the French 2nd Armored Division and the U.S. 4th Infantry Division after four years of German occupation. By the end of August, the Allies had reached the Seine River, and the Germans had retreated from northwestern France, effectively concluding the Normandy operation. At this stage, the Allied forces began preparing to enter Germany. The success of the Normandy invasion was a significant psychological and matériel blow to the Germans, although it did not spell the end of the war in Europe. It was not until the following spring, on May 8, 1945, that the Allies were to accept the unconditional surrender of Germany.
Operation Neptune, the naval component of Operation Overlord, played a vital role in spearheading the assault during and after the landings. U.S. Navy ships started one of the most famous days in history by bombarding the beaches of Omaha and Utah. A newly created Navy demolition unit removed obstacles alongside Army combat engineers early in the invasion. At one point in the historic battle, several destroyers positioned themselves as close to the shore as possible to fire point-blank at German fortifications. The action by the destroyers helped Allied troops, who were pinned down by enemy fire, to move forward and engage the enemy. During the night before the Allied forces had stormed the beaches, hundreds of airplanes had filled the skies over northern France, dropping paratroopers from the 82nd Airborne and 101st Airborne Divisions as well as from the British 6th Airborne Division. Although many of the paratroopers missed their assigned drop zones, the errors actually helped the Allies because they sparked confusion in the German high command, convincing them that the airborne force was much larger than it actually was at the time.
For their part, the Germans not only suffered from confusion during the landings, but the absence of their celebrated leader, Field Marshall Erwin Rommel—who was on leave at the time—also handicapped their defenses from the assault. At first, Hitler believed the Normandy landing was a diversion to distract the Germans from an actual attack that was to take place north of the Seine River. He refused to release nearby divisions to counterattack the Allies and initially resisted in deploying reserved armored divisions to help in the defense. In addition, the Germans were hampered by effective Allied air support, which took out many lines of communication, forcing German reinforcements to take long detours.
Although the invasion of northern France was successful, Navy losses were substantial on D-Day. Destroyer USS Corry (DD-463) was hit by German shore fire and then probably succumbed to a mine in the opening assault on Utah Beach. In addition, minesweeper USS Osprey (AM-56), and numerous amphibious craft, including 9 LCIs and 26 LCTs, were lost. In the days that followed, destroyers USS Glennon (DD-620) and USS Meredith (DD-726), destroyer escort USS Rich (DE-695), minesweeper USS Tide (AM-125), 5 LSTs, and the troop transport USS Susan B. Anthony (AP-72) were sunk by the Germans, mostly by mines, as they protected the flow of troops and supplies into the Normandy beachhead. In reflection, Rear Adm. Alan G. Kirk said, “Our greatest asset was the resourcefulness of the American Sailor.” The crews on board the destroyers also received accolades from many high-ranking officers within the Allied command for coming to the aid of troops on the ground just as the situation appeared dire. Major Gen. Leonard T. Gerow, who established V Corps headquarters on Omaha Beach, summed up the sentiment in a message to Gen. Omar N. Bradley, commander of U.S. First Army: “Thank God for the United States Navy!”
World War II “Hit ‘em HARDER” Submarine Wreck Site Confirmed
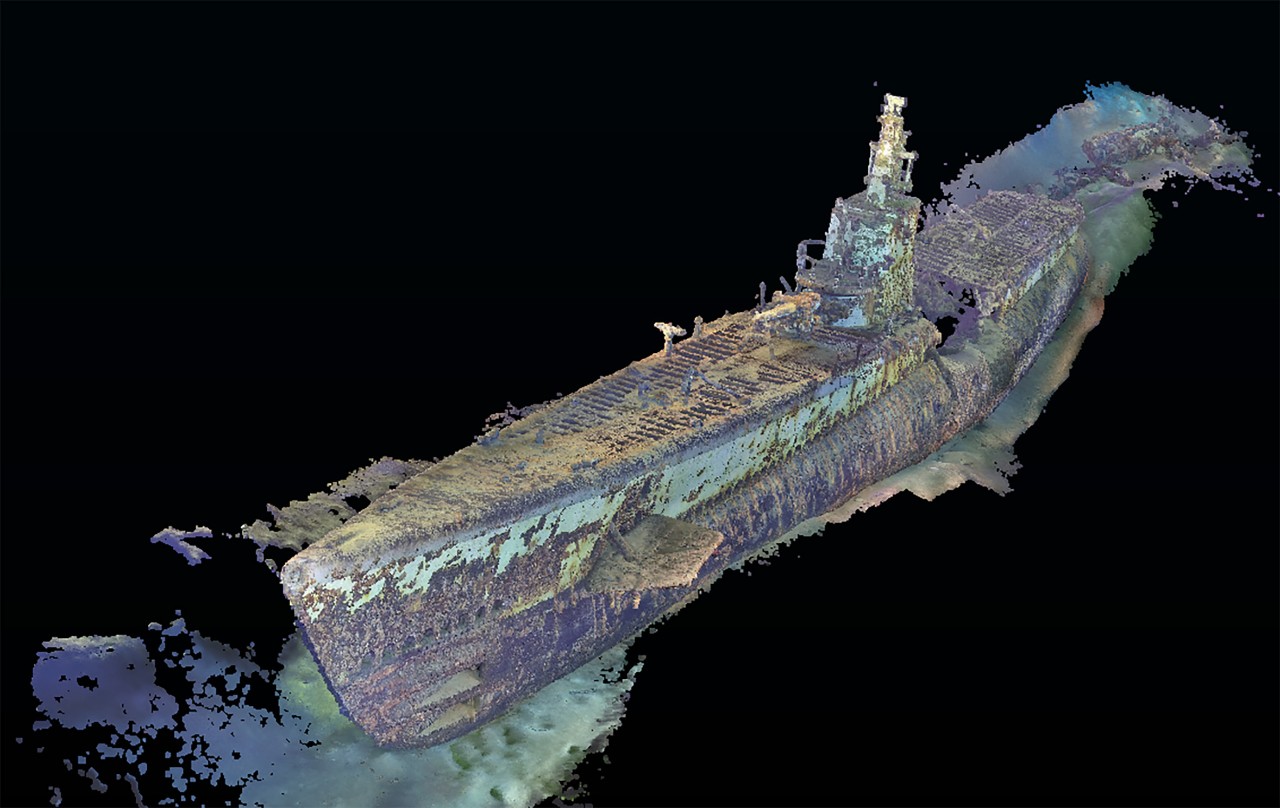
Using data collected and provided by Tim Taylor, CEO of Tiburon Subsea and the Lost 52 Project, NHHC’s Underwater Archaeology Branch confirmed the wreck site they discovered as the final resting place of USS Harder (SS-257).
Taylor received a Distinguished Public Service Award from the Navy in 2021 for Lost 52 Project’s work to locate, discover, and memorialize the 52 submarines lost during World War II. Previous submarines located by the Lost 52 project include USS Grayback (SS-208), USS Stickleback (SS-415), USS R-12 (SS-89), USS S-26 (SS-131), USS S-28 (SS-133), and USS Grunion (SS-216).
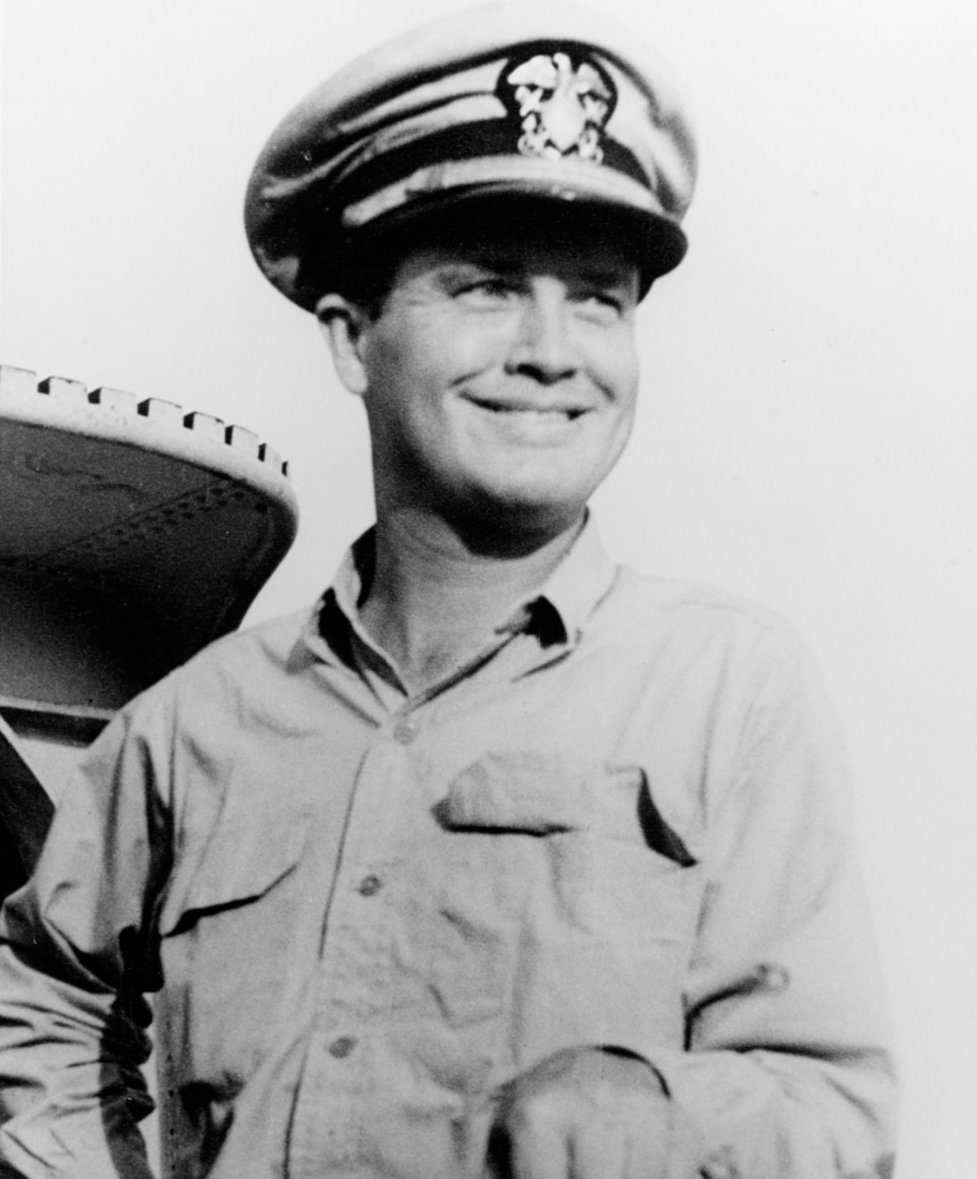
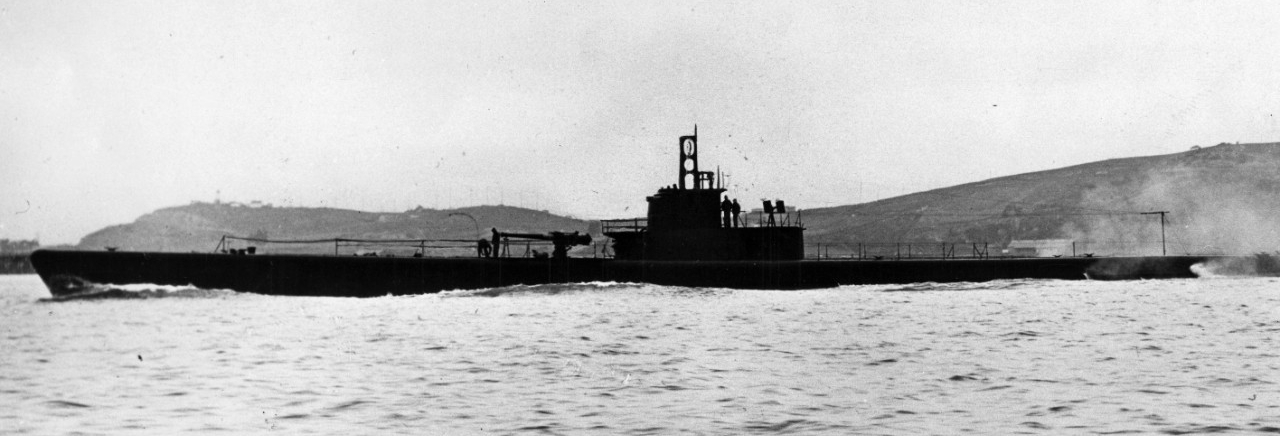
Harder was commissioned on Dec. 2, 1942, with Cmdr. Samuel D. Dealey in command, and lost at sea on Aug. 24, 1944. Seventy-nine crewmembers were on board the submarine.
Resting at a depth of more than 3,000 feet, the vessel sits upright on its keel relatively intact except for the depth-charge damage aft of the conning tower. Submarines by their very design can be a challenge to identify, but the excellent state of preservation of the site and the quality of the data collected by Lost 52 allowed for NHHC to confirm the identity of the wreck as Harder.
“Harder was lost in the course of victory. We must not forget that victory has a price, as does freedom,” said NHHC Director Samuel J. Cox, U.S. Navy rear admiral (retired). “We are grateful that Lost 52 has given us the opportunity to once again honor the valor of the crew of the ‘Hit ‘em HARDER’ submarine that sank the most Japanese warships—in particularly audacious attacks—under her legendary skipper, Cmdr. Sam Dealey.”
Harder’s fifth war patrol was the submarine’s most successful. Harder depleted the critical supply of destroyers by sinking three of them and heavily damaging or destroying two others in four days, and its frequent attacks resulted in Adm. Ozawa’s Mobile Fleet departing Tawi-Tawi a day ahead of schedule. The premature departure upset the Japanese battle plans and forced Ozawa to delay his carrier force in the Philippine Sea, contributing to the defeat suffered by the Japanese in the ensuing battle.
The submarine’s last known location was in the South China Sea off Luzon during its sixth and final war patrol. Early on Aug. 22, Harder and USS Haddo (SS-255) attacked and destroyed three escort ships off Bataan—Harder sinking escort ships Matsuwa and Hiburi. Joined by USS Hake (SS-256) that night, the coordinated attack group headed for Caiman Point, Luzon. At dawn on Aug. 23, Haddo attacked and fatally damaged Japanese destroyer Asakaze off Cape Bolinao. Haddo informed Harder and Hake that its torpedoes were expended and left for replenishment. Harder and Hake remained off Dasol Bay, searching for new targets. Before dawn on Aug. 24, Hake sighted the escort ship CD-22 and Patrol Boat No. 102. As Hake closed to attack, the patrol boat turned away toward Dasol Bay. Hake broke off approach, turned northward, sighting Harder’s periscope 600 to 700 yards dead ahead. Swinging southward, Hake sighted CD-22 about 2,000 yards off its port quarter. To escape, Hake went deep and rigged for silent running. At 7:28 a.m., Hake’s crew reported hearing 15 rapid depth charges explode in the distance astern. Hake continued evasive action, returning to the attack area shortly after noon to sweep the area at periscope depth—only finding a ring of marker buoys covering a half-mile radius. Japanese records later revealed Harder fired three torpedoes at CD-22. The Japanese ship evaded the torpedoes and began a series of depth charge attacks. The fifth depth charge attack sunk Harder with its crew.
Harder received the Presidential Unit Citation for its first five patrols, and all six were deemed successful. During his career, Cmdr. Dealey received the Navy Cross with three Gold Stars and the Army’s Distinguished Service Cross. He was posthumously awarded the Medal of Honor and a Silver Star. Harder received six battle stars for its World War II service.
Today in Naval History—Galveston and the Talos Missile
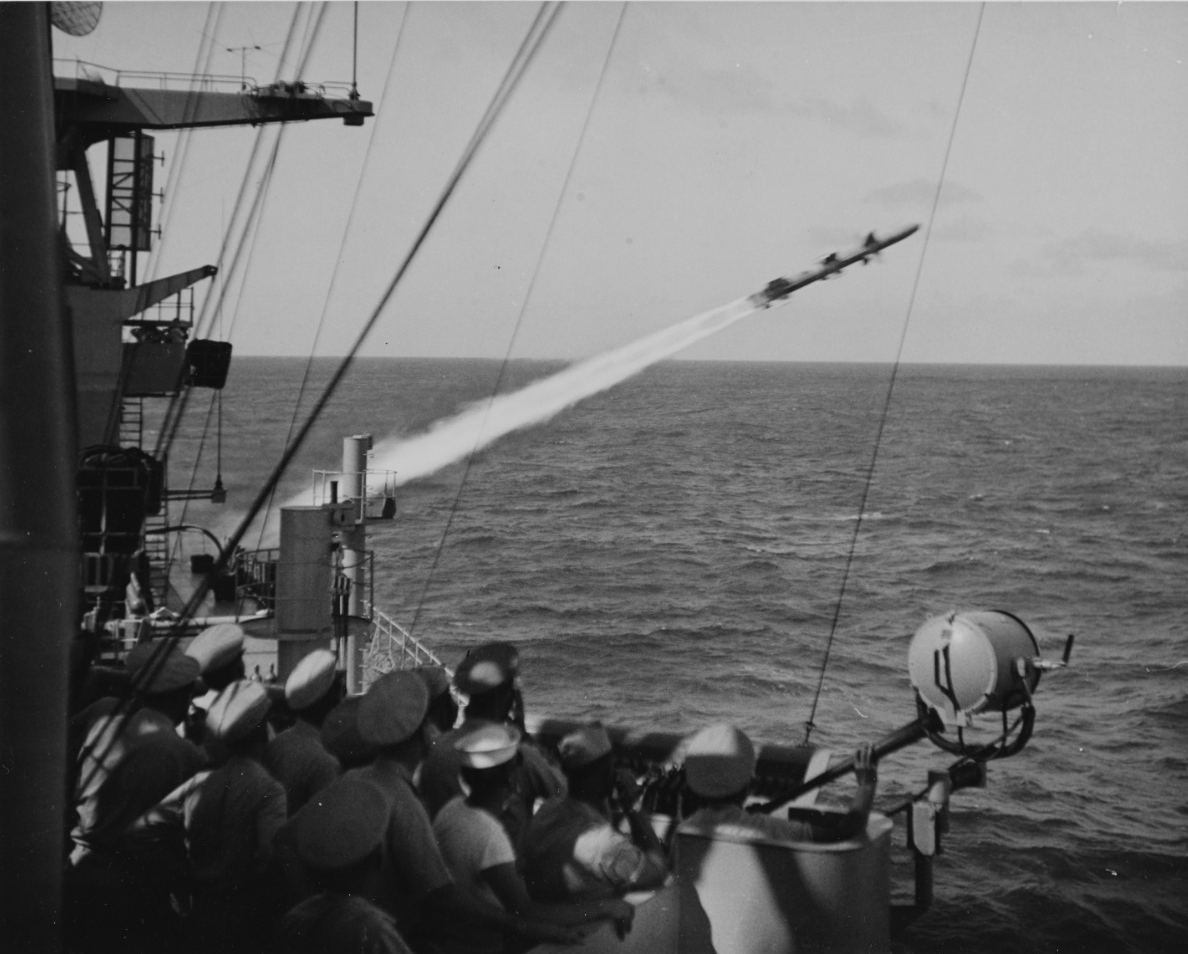
On May 28, 1958, USS Galveston (CLG-3), named for the coastal city in southeastern Texas, was commissioned at Philadelphia with Capt. J. B. Colwell in command. One month later, the cruiser departed Philadelphia for builder’s trials out of Norfolk, Virginia. After trials were complete, Galveston made for San Juan, Puerto Rico. While there, Galveston fired a Talos guided-missile on Feb. 24, 1959, the first time one was fired at sea. The deadly Talos supersonic surface-to-air missile weighed nearly 3,000 pounds, including a 40,000 horsepower ramjet engine, with a range of more than 65 miles. It was designed to destroy enemy aircraft at high altitudes using either a conventional or atomic warhead. Named by Chief of Naval Operations Adm. Arleigh Burke as “the best antiaircraft missile in any arsenal in the world,” the Talos sent its payload off in a trail of bright orange flame. Development of the Talos began around 1945 as part of Project Bumblebee (the Navy’s effort to develop surface-to-air missiles), which led to a family of missiles that included the Terrier, Tartar, and Talos. The Talos had a ramjet main stage and a first-stage, solid-fuel rocket booster that burned for two seconds, then dropped off after it had accelerated the missile to the high speed necessary for the ramjet to operate. Galveston reported the shot “hot, straight, and normal” as it proudly proved its capability as one of the deadliest warships of the modern U.S. Navy.
After the historic firing of the Talos, Galveston underwent shakedown and acceptance trials, testing its radar and communications in war games with the U.S. Air Force. In January 1961, Galveston departed Norfolk for more Bureau of Naval Weapons technical evaluations of its Talos missile systems, including tests of the IV Talos, its capabilities, and its potentials, in areas off Jacksonville, Florida; Puerto Rico; and the Virgin Islands. During the evaluation, the effectiveness of the Talos system were demonstrated by a new, long-range record as well as a successful two-missile salvo shot.
Following more training and an overhaul, Galveston made way for operations off the coast of South Vietnam in February 1965. During the tour of duty, Galveston ranged the Southeast Asian waters from the Gulf of Thailand to the Gulf of Tonkin while supporting the American effort during the Vietnam War. It provided gunfire support during search-and-clear operations at Chu Lai and at the Vun Tuong Peninsula. In addition, Galveston provided air defense for Seventh Fleet carriers in the South China Sea and conducted search and rescue operations in the Gulf of Tonkin. In 1969, Galveston returned to Vietnam where it divided its time between operations on Yankee Station in the north and the Da Nang area in the south. In 1970, Galveston was placed in the Reserve Fleet before it was scrapped in 1975.
